I'm just popping in quickly to show you these two cards I made this week.
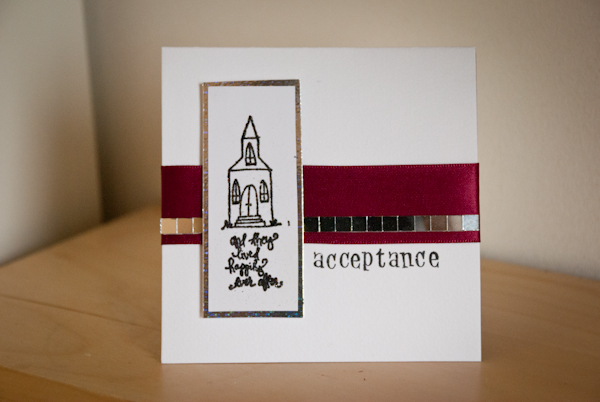
The first one is an acceptance card for a wedding that Mr Bogert and I have been invited to in August.
I have used a small white textured square card blank. I have wrapped a wide burgundy satin ribbon horizontally across the centre of the card, and taped the edges on the inside. Next, I stamped a little church stamp onto some plain white card using black ink, sprinkled with black sparkly embossing powder and heated to set it. (You can't really see the sparkle or raised edges of the print in this photograph). If you can't quite make it out, the stamp says 'And they lived happily ever after'. I mounted the stamped image onto silver card, and then fixed this over the ribbon using little foam pads to raise it off the surface of the card. I used the same 'studio g' alphabet stamps and black ink as the Fathers' Day cards to spell out the word 'Acceptance', and then I used some of the leftover mirror mosaics from the Small Person's crown decorating a few weeks ago.
I finished the inside off with a piece of patterned paper that came free with a magazine. This covers the taped ends of the ribbon.
The second card is a New Baby Girl card for a friend. I have used the same type of card blank as the acceptance above, and stamped it with a large baby bib stamp in silver. I sprinkled white glitter embossing powder over and heated to set (again, you can't see it very well in this image). I then punched two small holes close together at the neck of the bib. Through this a threaded a thin pale pink satin ribbon (from the inside of the card). I tied the ribbon in a simple bow and trimmed the ends so that they don't overlap the edge of the bib print.
I finished the inside with another piece of free paper. This covers the holes where the ribbon is threaded through. I also stamped 'Congratulations on your New Baby' in black ink on the message side of the card.
These were so simple, quick and even a little bit fun to make!


No comments:
Post a Comment